Windows 8, like its predecessor uses the broad “location” categories to help users configure appropriate network settings. You can change the network location and the appropriate accessibility settings like Private, Public or Home. In this article, we will tell you how you can change the network location in Windows 8. There are basically two techniques to do this. The first is for the non-Pro version of Windows 8 or for the uses who don’t have access to the Group Policy Editor and the second one is for the Pro versions. Many people confuse the two and end up failing to change the network location successfully. Lets get started.
For Non-Pro Versions
1. Users who don’t have access to the Local Group Policy Editor can use the Change network sharing settings. For this, open the Charms bar, Select “Settings” and select the network connection from the list. You can also open the Networks menu from the Task Bar.
2. Right Click on your network from the list and Click Turn sharing on or off

3. You will see two options here. “No, don’t turn on sharing or connect to devices” sets the location public. “Yes, turn on sharing and connect to devices” configures the network as private.
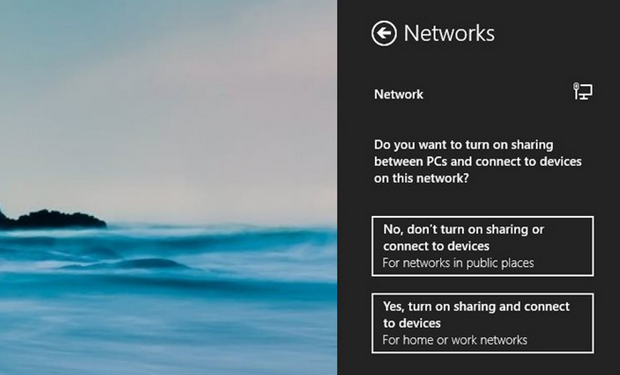
4. Select the desired option. You may be prompted by Windows User Account Control for permission to make the change. Press “Yes” to finish and you are done.
For Pro Version
In windows 8 pro version, you can easily use the Group Policy Editor to manually configure each network
1. Open Run and type “gpedit.msc” and hit Enter.
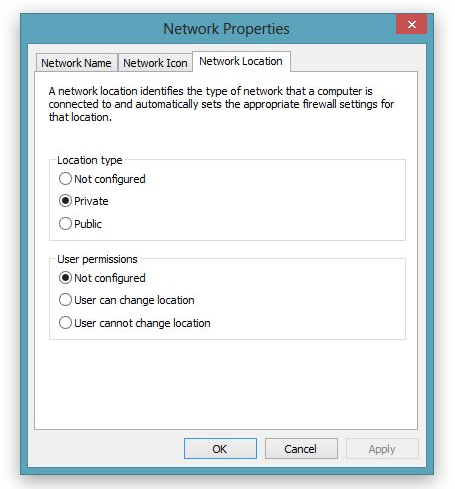
2. Navigate Computer Configuration > Windows Settings > Security Settings > Network List Manager Policies. Double Click your Network to open it’s Network Properties window.
3. From Network Location tab and change the “Location Type” according to your choice. Hit “Apply” and that’s it. You have successfully changed the Network Location