Jump Lists are handy to boost up the productivity and this nifty little feature introduced in Windows 7 and Windows 8 helps to grab and use the most recently used items in your machine so that you don’t have to search for them again. But a Jump List seems riddled and complex if it is amassed with much of the recently used items and the user finds it difficult to locate and search the required item, but we have the solution for this.
JumpList launcher, a free portable tool helps you create customized JumpLists with categorizations, groups, custom names and much more. It has a plethora of features to tweak up the JumpList fun. Its compatible with windows 7 and windows 8. Below is the step by step procedure to use this amazing tool. Read on and follow the steps.
1) Double Click the JumpList Launcher icon, it will look like this.
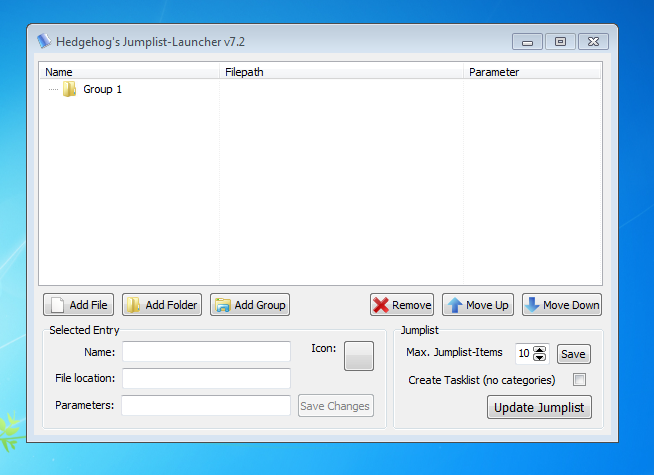
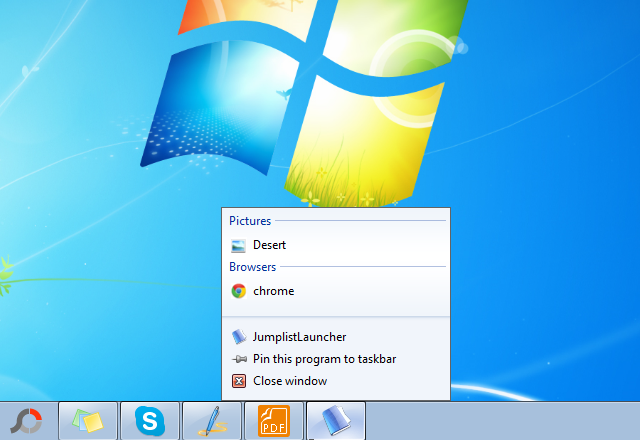
2) You can change the name of the group by double clicking it, I have named it “Pictures”

3) Now Click “Add File” Button at the Middle Left Side. File Explorer Window will be popped. Just select the file you want to add

4) You can add any type of files for example I added another group “Browsers” and added .exe file for Google Chrome.

5) Right Click in the JumpList Launcher icon in the TaskBar and Pin it to Taskbar.Now Close the JumpList Launcher Window. Right Click on the pinned icon, you will see the clear categorized groups.